GOOGLE DRIVE - THE WALKTHROUGH
Lightroom to Google Drive, on the real screen.
Ten minutes in Lightroom Classic, with Google Drive open so you can see both sides: installing the plugin, connecting Google Drive, your first folder, sharing it with a client, changing an edit after delivery, a smart folder that fills itself, and the cleanup tools. Use the chapters to jump to the part you need.
CLICK TO PLAY - WITH SOUND, CAPTIONS ON SCREEN - 10:03
CHAPTERS
The Google account in the video is a separate Workspace account, and the video only opens the folders the plugin made, so everything you see in Drive was created live by the plugin. The photos are from a real kitchen shoot. The plugin version shown is 0.1.3.
Read the narration instead
Google Drive is a plugin for Lightroom Classic that publishes your edited photos straight into Google Drive folders. Each collection in Lightroom becomes a folder. Change an edit later, press Publish, and the folder gets the new version. In this walkthrough we start from zero: download, install and sign in, then every feature, with Google Drive open so you can see what happens on both sides.
After you buy, you land on this page, and your license key arrives by email. Click Download Plugin. You get a zip file. Open it, and you have a folder called google-drive.lrplugin. That folder is the whole plugin, the same one for Mac and Windows.
First, move the folder somewhere it can stay. Lightroom's own Modules folder is a good home. Your Documents folder works too, just not Downloads, which tends to get cleaned out. Now in Lightroom, open File, Plug-in Manager, and click Add. Pick the google-drive.lrplugin folder, and click Add Plug-in. Google Drive is in the list, installed and running. Click Done.
The plugin lives in the Publish Services panel, on the left of the Library module. Click Set Up next to Google Drive. At the top, Plugin Update tells you when a newer version is out, with a button to download it. Next, License. Copy the key from your receipt email, paste it here, and click Activate. Licensed. If you ever move to a new computer, the Deactivate button is right here. More on that at the end.
Then Google Drive Account. Click Connect to Google Drive. Your browser opens Google's own sign-in page, and Lightroom waits while you finish there. If the browser that opened is not the one you use for Google, this waiting window has the sign-in link. Copy it into the right one. Pick the Google account whose Drive you want to use. Google shows what the plugin asks for: to see, edit, create and delete only the Drive files you use with this app. The plugin works with the folders and photos it creates, and it can't see anything else in your Drive. Tick the box, and click Continue. The browser says Authentication Successful. Back in Lightroom, click Continue. It now says Connected, with your Google address.
Everything below is Lightroom's usual export settings. Keep the format on JPEG, so your edits are baked into what lands in Drive. Original would send the untouched file, without your edits. Set the quality you like. I use ninety. Image size, sharpening, metadata and watermark work exactly as in any Lightroom export. Click Save.
Every published collection is one folder in Drive. Select the photos you want to deliver, here thirty picks from a kitchen shoot. Right-click Google Drive, Create Published Collection. Name it, tick Include selected photos, and click Create. The collection opens with the thirty photos under New Photos to Publish. Nothing goes to Google Drive until you press Publish.
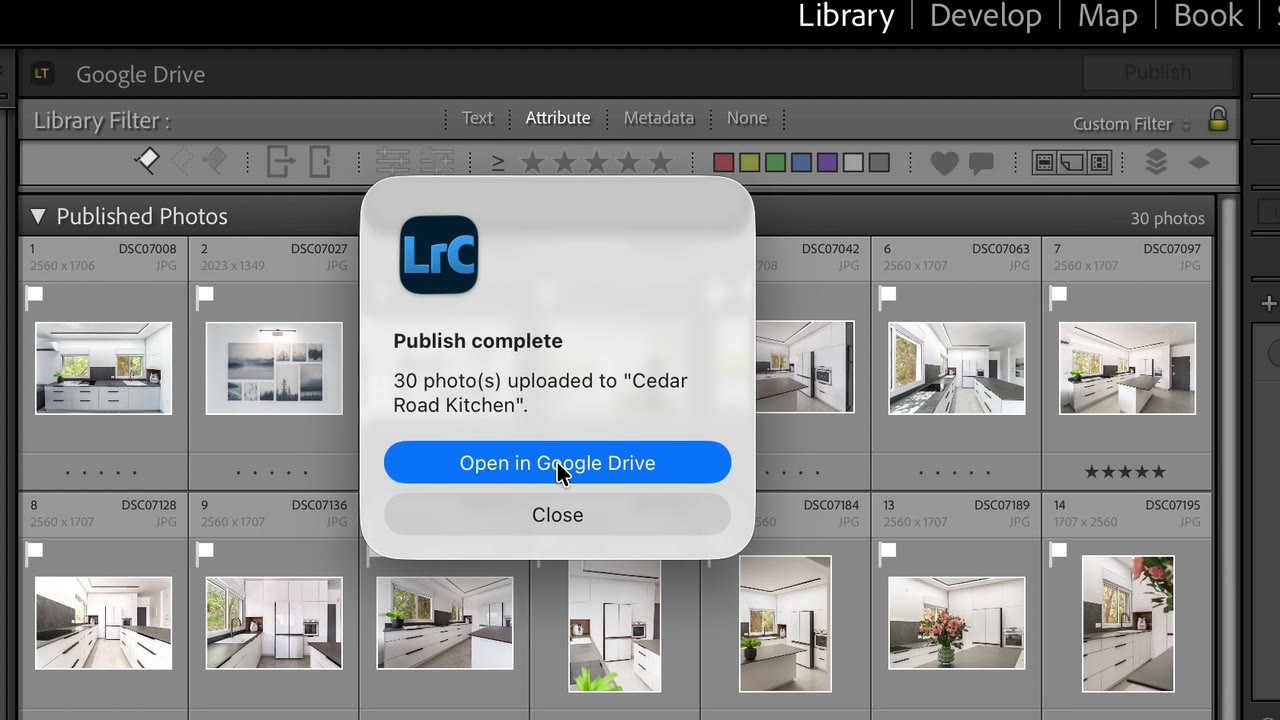
Click Publish. The plugin renders each photo with your edits and uploads it to Google Drive. Thirty photos uploaded. Open in Google Drive takes you straight to the folder. Every collection gets its own folder, inside a folder called Lightroom in My Drive. Here are the thirty photos, edits and all. Back in Lightroom, they have moved to Published Photos. That is how you know what is already in Drive.
Sharing happens in Google Drive, like any folder. Open the folder's menu and choose Share. Add your client's email here, or change General access to anyone with the link, and click Copy link. From then on, whatever you publish shows up in that folder for everyone you shared it with.
Now the real reason to publish instead of exporting: the client asks for changes after the folder is shared. This one goes a little warmer, and this one gets a wide sixteen by nine crop. Both move to Modified Photos to Re-Publish. Click Publish, and only those two upload. In Drive, the folder has the new versions, with the same names, in the same place. The old versions go to Drive's Trash, where you can restore them for thirty days. Nothing is deleted for good.
To add photos later, drag them onto the collection. Three more from the shoot. To take photos out, select them in the collection and remove them. Lightroom lists them under Deleted Photos to Remove. One Publish does both. Three new photos go up, and the two removed ones move to Drive's Trash. Photos that did not change are skipped, so publishing again is quick.
Rename the collection in Lightroom, and the folder in Drive gets the new name too.
Smart collections work too, so a folder can fill itself. Right-click Google Drive, Create Published Smart Collection. Call it Portfolio, with the rule: rating is five stars. Five photos from different shoots match, and Publish sends them. Give any photo five stars, and it is waiting in this collection. Publish, and it is in the Portfolio folder.
Make as many folders as you like. One collection, one folder. Here is a second shoot, forty-nine photos.
Delete a collection in Lightroom, and Lightroom asks what to do with its photos. Leave on Service keeps the files in Drive, and Lightroom stops tracking them. Use it for a folder your client still needs. Delete, and the plugin asks one more thing: trash the photos only, or the photos and the folder. Give it a moment on a big folder. Everything goes to Drive's Trash, and stays recoverable for thirty days.
One tool lives under Library, Plug-in Extras: Clear false re-publish marks. Lightroom sometimes marks photos as changed when they are not. This checks each one and clears the marks with no real edit behind them. The plugin also does this quietly in the background, so you will rarely need it.
Everything else is in the settings. Right-click Google Drive, Edit Settings. The plugin uses one Google account at a time. To switch, click Disconnect, then connect the other one. Moving to a new computer? Click Deactivate here first, then activate the same key on the new one.
A few things to know. The plugin only works with the folders it creates, so files you add to Drive by hand are left alone. If a folder already has a file with the same name that Lightroom did not upload, the plugin asks before it replaces anything. The full written guide is at lightroom-tools.com/google-drive-guide, and a real person answers at [email protected].
The written guide covers the same ground with screenshots: Google Drive setup and usage guide. If something in the video does not match what you see on your own screen, email [email protected] with a screenshot of that spot - I answer every message myself.