How does Lightroom Classic's AI Denoise actually work - and has your workflow kept up with the 2025 update?
Quick Answer
AI Denoise (Photo > Enhance > Denoise) uses a neural network trained on millions of noisy/clean pairs to reconstruct detail that classical noise reduction can't recover. As of Lightroom Classic 14.4 (June 2025), the results are stored non-destructively inside your .lrcat-data file - no more DNG copies cluttering your library. The catch: that catalog sidecar is now critical data that your backup strategy has to account for.
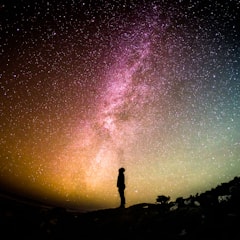
Here's the problem most photographers run into: they shot a wedding reception, a milky-way landscape, or anything at ISO 6400+, and Lightroom's classic noise reduction just smears the detail into a watercolor painting. That's not a skill issue - it's a physics limit that classical luminance/color sliders can't overcome.
AI Denoise solves this at the cost of a couple of seconds of GPU time. It doesn't just reduce noise - it actually reconstructs plausible detail from the noise signal. The results at high ISO are genuinely different from anything available a few years ago. But the workflow around it has changed significantly since it launched, and a lot of tutorials are still describing the old DNG-copy approach.
What changed in Lightroom 14.4 - and why it matters if you're still making DNG copies
When Adobe first shipped AI Denoise in Lightroom Classic 12.3 (April 2023), it worked by creating a brand-new DNG file alongside your original. You'd select a raw, hit Photo > Enhance > Denoise, wait 10-30 seconds, and land on a new "denoised" DNG stacked in the same folder. The original was untouched, but now you had a second full-resolution file for every photo you denoised - potentially gigabytes of extra storage.
In Lightroom Classic 14.4 (June 2025), Adobe changed the architecture. Denoise results are now stored non-destructively inside your catalog's .lrcat-data file - the same sidecar that holds AI masking data and Generative Remove results. No new DNG is written to disk. The original raw stays untouched and the denoise output lives in the catalog, just like any other edit.
If you upgraded to 14.4+ and still expect a DNG to appear in your folder after running Denoise, it won't. That's not a bug. And if you ran Denoise on photos under the old workflow and now see a stack of orphaned DNG copies in folders, those are safe to clean up - just confirm first in Lightroom that the denoised version you care about is the catalog-stored one, not the old DNG stack.
How to enable AI Denoise and choose the right strength
The entry point hasn't changed: select one or more raws in the Library or Develop module, then go to Photo > Enhance > Denoise. Lightroom shows a full-resolution preview of the result before you commit.
The strength slider runs 0-100. Here's how I actually use it:
- ISO 800-3200 / subtle grain: 25-40. Enough to clean up shadow noise without touching mid-tone texture.
- ISO 3200-6400 / visible color noise: 50-65. The sweet spot for most event and travel work.
- ISO 6400-25600 / serious noise: 70-85. At this range the AI earns its keep - detail recovery is visible even at 100% crop.
- Above 25600 / extreme: 85-100. Results vary by camera sensor, but for anything shot at ISO 51200 you've got nothing to lose.
For batch processing, select all the photos first, adjust strength on one, then hold Option (Mac) / Alt (Win) when clicking Enhance to apply the same settings to the whole selection. Lightroom queues the jobs and processes them in the background - you can keep editing while it runs.
What files does Denoise actually touch?
Here's the thing most people miss about the v14.4 change: the denoise result lives in YourCatalog.lrcat-data, not inside YourCatalog.lrcat itself.
 Noisy high-ISO RAW
Original file, never modified
Noisy high-ISO RAW
Original file, never modified
The 14.4 change: the old workflow output a brand-new DNG for every denoised photo - it never edited your RAW in place. Since Lightroom Classic 14.4 (June 2025) the denoise result is stored non-destructively in your .lrcat-data sidecar instead, so no new DNG is written. Either way the original RAW is untouched, but the file footprint - and what your backup and sync routine has to cover - is different.
Lightroom Classic has had a .lrcat-data sidecar for a while - it stores AI mask data (Select Subject, Select Sky, etc.) and Generative Remove results. Adobe extended it to hold Denoise outputs in 14.4. The main .lrcat file holds metadata, develop settings, and the rest of your catalog state. But the big computed blobs - AI masks, generative edits, denoise results - live in .lrcat-data.
What this means in practice:
- The original raw file is never modified.
- No new DNG appears in your photo folders.
- Denoise output is non-destructive and reversible (reset via Develop > Reset or by deleting the enhance in the Enhance dialog).
- The
.lrcat-datafile grows as you use AI features. A library with heavy Denoise and mask use can see this file reach several GB.
When to apply Denoise in your editing order - before or after masking?
Apply Denoise before creating AI masks - especially Select Subject and Select Sky. Those AI masks are generated from the visible pixel data in the image. If the image is still noisy when you create a mask, the mask edges will follow noise artifacts rather than true subject edges, which means jagged halos and missed regions.
Run Denoise first, let the catalog update, then go back and build your masks. The edge detection runs on the cleaner image and produces substantially sharper selection boundaries. This is especially noticeable on hair, fur, and fine foliage.
The one exception: if you're doing heavy local adjustments with brushes (not AI masks), order matters less. Manual brushes follow your painting, not pixel data.
AI Denoise vs. the manual Detail panel: when each wins
| Scenario | Use AI Denoise | Use Detail Panel |
|---|---|---|
| ISO > 3200, visible chroma noise | ✓ | |
| Low-light with fine texture (fabric, skin) | ✓ | |
| ISO 400-800, mild luminance grain | ✓ | |
| Preserving intentional film grain aesthetic | ✓ | |
| Batch processing hundreds of files fast | ✓ (background queue) | ✓ (sync settings) |
| JPEG or TIFF (not raw) | ✓ (works, slower) | ✓ |
The Detail panel's Luminance and Color sliders are still worth knowing. They're fast, apply instantly, and for modest noise at ISO 800-1600 the result is often indistinguishable from AI Denoise. Save AI Denoise for the shots where manual sliders visibly destroy texture.
Backup and multi-machine gotchas with the new catalog-stored workflow
This is where workflows quietly break. Most backup guides say "back up your .lrcat file." That's no longer enough.
If your .lrcat-data file is missing or left behind - whether you restored from an old backup, copied just the .lrcat to a new machine, or sent your catalog to a collaborator - all your AI Denoise results, AI masks, and Generative Remove edits vanish. The photos still exist and your develop sliders are still there, but those computed enhancements are gone.
A few things to check right now:
- Backup scripts: If you're backing up with rsync, Time Machine, or a custom script, confirm it includes
*.lrcat-data- not just*.lrcat. - Lightroom's built-in backup: Lightroom's own "Back Up Catalog" dialog (Edit > Catalog Settings > Back Up Catalog) backs up both files. If you're using this, you're covered.
- Multi-machine workflows: If you edit on a desktop and a laptop, syncing just the
.lrcatbetween them leaves all your Denoise work on whichever machine you last ran Denoise on. Sync the pair together, or accept that AI enhancements are machine-local. - Sharing catalogs: Sending a catalog to a second photographer? Include the
.lrcat-dataor they'll see your edits but not your denoise results.
The size of .lrcat-data grows with usage. A catalog with a few hundred denoised images and a few thousand AI masks can easily hit 1-2 GB. Factor that into storage and transfer plans.
For a deeper look at how catalog structure affects day-to-day workflow - including Smart Previews and offline editing - see our post on what Smart Previews actually are and when to use them.